Difference between revisions of "Enemies"
2596810686 (talk | contribs) |
m |
||
| (33 intermediate revisions by 4 users not shown) | |||
| Line 1: | Line 1: | ||
== | == Wildlife == | ||
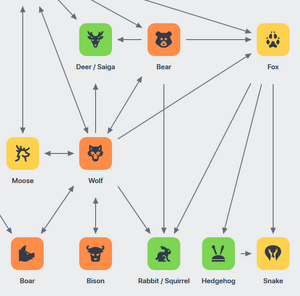
[[File:AnimalScheme.png|thumb|300px|Fragment of a concept-scheme of relationships between animals]] | [[File:AnimalScheme.png|thumb|300px|Fragment of a concept-scheme of relationships between animals]] | ||
| Line 22: | Line 8: | ||
'''Harmless Animals''' are mobs that will run away when they see or hear a player character. Most of them have valuable horns or pelts that can be harvested with [[Butchering]] from [[Survival (skill tree)|Survival]] skill tree. | '''Harmless Animals''' are mobs that will run away when they see or hear a player character. Most of them have valuable horns or pelts that can be harvested with [[Butchering]] from [[Survival (skill tree)|Survival]] skill tree. | ||
{{Clear}} | |||
{| class="stoneshard valign-bottom cell-hover" style="width: 1150px; text-align: center; margin: auto;" | {| class="stoneshard valign-bottom cell-hover" style="width: 1150px; text-align: center; margin: auto;" | ||
!colspan="10" | | !colspan="10" | | ||
| Line 28: | Line 15: | ||
|[[File:Deer-2.png|link=Deer|class=image2x]][[File:Deer.png|link=Deer|class=image2x]]<br><b>[[Deer]]</b> | |[[File:Deer-2.png|link=Deer|class=image2x]][[File:Deer.png|link=Deer|class=image2x]]<br><b>[[Deer]]</b> | ||
|[[File:Saiga.png|link=Saiga|class=image2x]][[File:Saiga-2.png|link=Saiga|class=image2x]]<br><b>[[Saiga]]</b> | |[[File:Saiga.png|link=Saiga|class=image2x]][[File:Saiga-2.png|link=Saiga|class=image2x]]<br><b>[[Saiga]]</b> | ||
|[[File:Horse | |[[File:Horse.png|link=Horse|class=image2x]]<br><b>[[Horse]]</b> | ||
|- | |- | ||
|[[File:Pig.png|link=Pig|class=image2x]]<br><b>[[Pig]]</b> | |[[File:Pig.png|link=Pig|class=image2x]]<br><b>[[Pig]]</b> | ||
| Line 39: | Line 26: | ||
|- | |- | ||
|[[File:Hedgehog.png|link=Hedgehog|class=image2x]]<br><b>[[Hedgehog]]</b> | |[[File:Hedgehog.png|link=Hedgehog|class=image2x]]<br><b>[[Hedgehog]]</b> | ||
|[[File:Cat.png|link=Cat|class=image2x]]<br><b>[[Cat]]</b> | |||
|[[File:Dog.png|link=Dog|class=image2x]]<br><b>[[Dog]]</b> | |||
|} | |} | ||
| Line 70: | Line 59: | ||
=== Hostile Animals === | === Hostile Animals === | ||
|- | |- | ||
! colspan="1" |Mini-bosses | |||
! colspan="6" |Beasts | |||
|- | |||
| rowspan="3" |[[File:Crawler Broodmother.png|link=Crawler Broodmother|class=image2x]]<br><b>[[Crawler Broodmother]]</b> [[File:Marker cave white.png|link=|16px]] | |||
|[[File:Bear.png|link=Bear|class=image2x]]<br><b>[[Bear]]</b> | |[[File:Bear.png|link=Bear|class=image2x]]<br><b>[[Bear]]</b> | ||
|[[File:Boar.png|link=Boar|class=image2x]]<br><b>[[Boar]]</b> | |[[File:Boar.png|link=Boar|class=image2x]]<br><b>[[Boar]]</b> | ||
|[[File:Bison.png|link=Bison|class=image2x]]<br><b>[[Bison]]</b> | |[[File:Bison.png|link=Bison|class=image2x]]<br><b>[[Bison]]</b> | ||
|[[File:Spiderling.png|link=Spiderling|class=image2x]]<br><b>[[Spiderling]]</b> [[File:Marker cave white.png|link=|16px]] | |||
|[[File:Crawler.png|link=Crawler|class=image2x]]<br><b>[[Crawler]]</b> | |[[File:Crawler.png|link=Crawler|class=image2x]]<br><b>[[Crawler]]</b> | ||
|[[File:Deathstinger Swarm.png|link=Deathstinger Swarm|class=image2x]]<br><b>[[Deathstinger Swarm]]</b> | |[[File:Deathstinger Swarm.png|link=Deathstinger Swarm|class=image2x]]<br><b>[[Deathstinger Swarm]]</b> | ||
|- | |- | ||
|[[File:Forest Viper.png|link=Forest Viper|class=image2x]]<br><b>[[Forest Viper]]</b> | |[[File:Forest Viper.png|link=Forest Viper|class=image2x]]<br><b>[[Forest Viper]]</b> | ||
|[[File: | |[[File:Rat Swarm.png|link=Rat Swarm|class=image2x]]<br><b>[[Rat Swarm]]</b> | ||
|[[File:Harpy 2.png|link=Harpy|class=image2x]][[File:Harpy.png|link=Harpy|class=image2x]]<br><b>[[Harpy]]</b> | |[[File:Harpy 2.png|link=Harpy|class=image2x]][[File:Harpy.png|link=Harpy|class=image2x]]<br><b>[[Harpy]]</b> | ||
|[[File:Moose.png|link=Moose|class=image2x]]<br><b>[[Moose]]</b> | |[[File:Moose.png|link=Moose|class=image2x]]<br><b>[[Moose]]</b> | ||
|[[File:Wolf.png|link=Wolf|class=image2x]]<br><b>[[Wolf]]</b> | |[[File:Wolf.png|link=Wolf|class=image2x]]<br><b>[[Wolf]]</b> | ||
|[[File:Feral Dog.png|link=Feral Dog|class=image2x]]<br><b>[[Feral Dog]]</b> | |||
|- | |||
|[[File:Gulon.png|link=Gulon|class=image2x]]<br><b>[[Gulon]]</b> | |[[File:Gulon.png|link=Gulon|class=image2x]]<br><b>[[Gulon]]</b> | ||
|[[File:Young_Troll.png|link=Young Troll|class=image2x]]<br><b>[[Young Troll]]</b> | |[[File:Young_Troll.png|link=Young Troll|class=image2x]]<br><b>[[Young Troll]]</b> | ||
|[[File:Bat Swarm.png|link=Bat Swarm|class=image2x]]<br><b>[[Bat Swarm]]</b> [[File:Marker cave white.png|link=|16px]] | |||
|} | |} | ||
| Line 103: | Line 98: | ||
== Enemies == | == Enemies == | ||
Enemies are all creatures that will attack you on sight. There are many different kinds of enemies and each comes with their own set of priorities and [[Skills]] they can use. Enemies of a certain type cooperate together (for example, Wolves form packs), but they may not cooperate with enemies of a different type (for example, Wolves and Bandits will attack each other). | Enemies are all creatures that will attack you on sight. There are many different kinds of enemies and each comes with their own set of priorities and [[Skills]] they can use. Enemies of a certain type cooperate together (for example, Wolves form packs), but they may not cooperate with enemies of a different type (for example, Wolves and Bandits will attack each other). | ||
{{Quote|TODO}} | {{Quote|TODO}} | ||
'''Brigands''' | '''Brigands''' — faction mostly made up of people: from ragamuffins and marauders at the first "shooting ranges" to deserters and former mercenaries at the later ones. The dungeon for them is the [[Dungeons#The Bastion|Bastion]]. Brigands are the only type of Enemies that can spawn on the surface, with the exception of Ghouls. | ||
{| class="stoneshard column valign-bottom cell-hover" style="width: 1500px; text-align: center; margin: auto;" | {| class="stoneshard column valign-bottom cell-hover" style="width: 1500px; text-align: center; margin: auto;" | ||
! colspan=" | ! colspan="10" | | ||
=== Brigands === | === Brigands === | ||
|- | |- | ||
! | ! | ||
! colspan=" | ! colspan="2" |Mini-bosses | ||
! colspan=" | ! colspan="7" |Common Enemies | ||
|- | |- | ||
| style="vertical-align: middle;" |'''Tier I''' | | rowspan="2" style="vertical-align: middle;" |'''Tier I''' | ||
|[[File:Brute.png|link=Brute|class=image2x]]<br><b>[[Brute]]</b> | |||
|[[File:Goon.png|link=Goon|class=image2x]]<br><b>[[Goon]]</b> | |[[File:Madman.png|link=Madman|class=image2x]]<br><b>[[Madman]]</b> | ||
|[[File:Goon (Cleaver).png|link=Goon (Cleaver)|class=image2x]]<br><b>[[Goon (Cleaver)|Goon]]</b> | |[[File:Goon (Club).png|link=Goon (Club)|class=image2x]]<br><b>[[Goon (Club)]]</b> | ||
|[[File: | |[[File:Goon (Cleaver).png|link=Goon (Cleaver)|class=image2x]]<br><b>[[Goon (Cleaver)]]</b> | ||
|[[File:Goon (Flail).png|link=Goon (Flail)|class=image2x]]<br><b>[[Goon (Flail)]]</b> | |||
|[[File:Miner.png|link=Miner|class=image2x]]<br><b>[[Miner]]</b> [[File:Marker cave white.png|link=|16px]] | |||
|[[File:Scout.png|link=Scout|class=image2x]]<br><b>[[Scout]]</b> [[File:Marker cave white.png|link=|16px]] | |||
|[[File:Rebel.png|link=Rebel|class=image2x]]<br><b>[[Rebel]]</b> | |[[File:Rebel.png|link=Rebel|class=image2x]]<br><b>[[Rebel]]</b> | ||
|[[File:Enforcer (Two-Handed Mace).png|link=Enforcer (Two-Handed Mace)|class=image2x]]<br><b>[[Enforcer (Two-Handed Mace) | |- | ||
|[[File:Enforcer (Two-Handed Axe).png|link=Enforcer (Two-Handed Axe)|class=image2x]]<br><b>[[Enforcer (Two-Handed Axe) | | colspan="2" |[[File:Overseer.png|link=Overseer|class=image2x]]<br><b>[[Overseer]]</b> [[File:Marker cave white.png|link=|16px]] | ||
|[[File:Enforcer (Two-Handed Sword).png|link=Enforcer (Two-Handed Sword)|class=image2x]]<br><b>[[Enforcer (Two-Handed Sword) | |[[File:Enforcer (Two-Handed Mace).png|link=Enforcer (Two-Handed Mace)|class=image2x]]<br><b>[[Enforcer (Two-Handed Mace)]]</b> | ||
|[[File:Enforcer (Two-Handed Axe).png|link=Enforcer (Two-Handed Axe)|class=image2x]]<br><b>[[Enforcer (Two-Handed Axe)]]</b> | |||
|[[File:Enforcer (Two-Handed Sword).png|link=Enforcer (Two-Handed Sword)|class=image2x]]<br><b>[[Enforcer (Two-Handed Sword)]]</b> | |||
|[[File:Poacher.png|link=Poacher|class=image2x]]<br><b>[[Poacher]]</b> | |[[File:Poacher.png|link=Poacher|class=image2x]]<br><b>[[Poacher]]</b> | ||
|- | |||
| rowspan="2" style="vertical-align: middle;" |'''Tier II''' | |||
|[[File:Firestarter.png|link=Firestarter|class=image2x]]<br><b>[[Firestarter]]</b> | |||
|[[File:Rabble-Rouser.png|link=Rabble-Rouser|class=image2x]]<br><b>[[Rabble-Rouser]]</b> | |||
|[[File:Thug (Spear).png|link=Thug (Spear)|class=image2x]]<br><b>[[Thug (Spear)]]</b> | |||
|[[File:Thug (Two-Handed Axe).png|link=Thug (Two-Handed Axe)|class=image2x]]<br><b>[[Thug (Two-Handed Axe)]]</b> | |||
|[[File:Thug (Two-Handed Sword).png|link=Thug (Two-Handed Sword)|class=image2x]]<br><b>[[Thug (Two-Handed Sword)]]</b> | |||
|[[File:Thug (Two-Handed Flail).png|link=Thug (Two-Handed Flail)|class=image2x]]<br><b>[[Thug (Two-Handed Flail)]]</b> | |||
|[[File:Thug (Two-Handed Mace).png|link=Thug (Two-Handed Mace)|class=image2x]]<br><b>[[Thug (Two-Handed Mace)]]</b> | |||
|[[File:Mancatcher (Enemy).png|link=Mancatcher (Enemy)|class=image2x]]<br><b>[[Mancatcher (Enemy)]]</b> | |||
|[[File:War Dog.png|link=War Dog|class=image2x]]<br><b>[[War Dog]]</b> | |[[File:War Dog.png|link=War Dog|class=image2x]]<br><b>[[War Dog]]</b> | ||
|- | |- | ||
| colspan="2" |[[File:Raider.png|link=Raider|class=image2x]]<br><b>[[Raider]]</b> [[File:Marker cave white.png|link=|16px]] | |||
| colspan=" | |[[File:Henchman (Axe).png|link=Henchman (Axe)|class=image2x]]<br><b>[[Henchman (Axe)]]</b> | ||
|[[File:Henchman (Flail).png|link=Henchman (Flail)|class=image2x]]<br><b>[[Henchman (Flail)]]</b> | |||
|[[File:Henchman ( | |[[File:Henchman (Mace).png|link=Henchman (Mace)|class=image2x]]<br><b>[[Henchman (Mace)]]</b> | ||
|[[File: | |||
|[[File: | |||
|[[File:Crook.png|link=Crook|class=image2x]]<br><b>[[Crook]]</b> | |[[File:Crook.png|link=Crook|class=image2x]]<br><b>[[Crook]]</b> | ||
|[[File:Outlaw.png|link=Outlaw|class=image2x]]<br><b>[[Outlaw]]</b> | |[[File:Outlaw.png|link=Outlaw|class=image2x]]<br><b>[[Outlaw]]</b> | ||
|- | |- | ||
| style="vertical-align: middle;" |'''Tier III''' | | rowspan="3" style="vertical-align: middle;" |'''Tier III''' | ||
| rowspan="2" |[[File:Bonebreaker (Two-Handed Axe).png|link=Bonebreaker (Two-Handed Axe)|class=image2x]]<br><b>[[Bonebreaker (Two-Handed Axe)]]</b> | |||
| rowspan="2" |[[File:Bonebreaker (Two-Handed Mace).png|link=Bonebreaker (Two-Handed Mace)|class=image2x]]<br><b>[[Bonebreaker (Two-Handed Mace)]]</b> | |||
|[[File:Marauder (Two-Handed Mace).png|link=Marauder (Two-Handed Mace)|class=image2x]]<br><b>[[Marauder (Two-Handed Mace)]]</b> | |||
|[[File:Marauder (Two-Handed Axe).png|link=Marauder (Two-Handed Axe)|class=image2x]]<br><b>[[Marauder (Two-Handed Axe)]]</b> | |||
|[[File:Marauder (Two-Handed Sword).png|link=Marauder (Two-Handed Sword)|class=image2x]]<br><b>[[Marauder (Two-Handed Sword)]]</b> | |||
|[[File:Marauder (Two-Handed Flail).png|link=Marauder (Two-Handed Flail)|class=image2x]]<br><b>[[Marauder (Two-Handed Flail)]]</b> | |||
|[[File:Marauder (Halberd).png|link=Marauder (Halberd)|class=image2x]]<br><b>[[Marauder (Halberd)]]</b> | |||
|[[File:Marauder (Spear).png|link=Marauder (Spear)|class=image2x]]<br><b>[[Marauder (Spear)]]</b> | |||
|[[File:Cutthroat.png|link=Cutthroat|class=image2x]]<br><b>[[Cutthroat]]</b> | |||
|- | |||
|[[File:Prospector.png|link=Prospector|class=image2x]]<br><b>[[Prospector]]</b> [[File:Marker cave white.png|link=|16px]] | |||
|[[File:Spelunker.png|link=Spelunker|class=image2x]]<br><b>[[Spelunker]]</b> [[File:Marker cave white.png|link=|16px]] | |||
|[[File:Turncoat (Sword).png|link=Turncoat (Sword)|class=image2x]]<br><b>[[Turncoat (Sword)]]</b> | |||
|[[File:Turncoat (Axe).png|link=Turncoat (Axe)|class=image2x]]<br><b>[[Turncoat (Axe)]]</b> | |||
|[[File:Turncoat (Mace).png|link=Turncoat (Mace)|class=image2x]]<br><b>[[Turncoat (Mace)]]</b> | |||
|[[File:Turncoat (Flail).png|link=Turncoat (Flail)|class=image2x]]<br><b>[[Turncoat (Flail)]]</b> | |||
|- | |||
|[[File:Brigand Warlock.png|link=Brigand Warlock|class=image2x]]<br><b>[[Brigand Warlock]]</b> | |[[File:Brigand Warlock.png|link=Brigand Warlock|class=image2x]]<br><b>[[Brigand Warlock]]</b> | ||
|[[File: | |[[File:Torturer.png|link=Torturer|class=image2x]]<br><b>[[Torturer]]</b> [[File:Marker cave white.png|link=|16px]] | ||
|[[File:Hired Sorcerer (Pyromancer).png|link=Hired Sorcerer (Pyromancer)|class=image2x]]<br><b>[[Hired Sorcerer (Pyromancer)]]</b> | |||
|[[File:Hired Sorcerer (Electromancer).png|link=Hired Sorcerer (Electromancer)|class=image2x]]<br><b>[[Hired Sorcerer (Electromancer)]]</b> | |||
|[[File: | |[[File:Drummer.png|link=Drummer|class=image2x]]<br><b>[[Drummer]]</b> | ||
|[[File: | |||
|[[File: | |||
|[[File:Ambusher.png|link=Ambusher|class=image2x]]<br><b>[[Ambusher]]</b> | |[[File:Ambusher.png|link=Ambusher|class=image2x]]<br><b>[[Ambusher]]</b> | ||
|- | |- | ||
| style="vertical-align: middle;" |'''Tier IV''' | | rowspan="2" style="vertical-align: middle;" |'''Tier IV''' | ||
|[[File:Beast Trapper.png|link=Beast Trapper|class=image2x]]<br><b>[[Beast Trapper]]</b> | |[[File:Beast Trapper.png|link=Beast Trapper|class=image2x]]<br><b>[[Beast Trapper]]</b> | ||
|[[File:Rogue Knight.png|link=Rogue Knight|class=image2x]]<br><b>[[Rogue Knight]]</b> | |||
|[[File:Deserter (Sword).png|link=Deserter (Sword)|class=image2x]]<br><b>[[Deserter (Sword)]]</b> | |||
|[[File:Deserter (Axe).png|link=Deserter (Axe)|class=image2x]]<br><b>[[Deserter (Axe)]]</b> | |||
|[[File:Deserter (Flail).png|link=Deserter (Flail)|class=image2x]]<br><b>[[Deserter (Flail)]]</b> | |||
|[[File:Deserter (Two-Handed Flail).png|link=Deserter (Two-Handed Flail)|class=image2x]]<br><b>[[Deserter (Two-Handed Flail)]]</b> | |||
|[[File:Magistrate Deserter (Halberd).png|link=Magistrate Deserter (Halberd)|class=image2x]]<br><b>[[Magistrate Deserter (Halberd)]]</b> | |||
|[[File:Magistrate Deserter (Two-Handed Axe).png|link=Magistrate Deserter (Two-Handed Axe)|class=image2x]]<br><b>[[Magistrate Deserter (Two-Handed Axe)]]</b> | |||
|[[File:Magistrate Deserter (Two-Handed Mace).png|link=Magistrate Deserter (Two-Handed Mace)|class=image2x]]<br><b>[[Magistrate Deserter (Two-Handed Mace)]]</b> | |||
|- | |||
| colspan="2" |[[File:Paymaster.png|link=Paymaster|class=image2x]]<br><b>[[Paymaster]]</b> | | colspan="2" |[[File:Paymaster.png|link=Paymaster|class=image2x]]<br><b>[[Paymaster]]</b> | ||
|[[File: | |[[File:Banneret.png|link=Banneret|class=image2x]]<br><b>[[Banneret]]</b> | ||
|[[File:Marksman.png|link=Marksman|class=image2x]]<br><b>[[Marksman]]</b> | |[[File:Marksman.png|link=Marksman|class=image2x]]<br><b>[[Marksman]]</b> | ||
|[[File:Magehunter.png|link=Magehunter|class=image2x]]<br><b>[[Magehunter]]</b> | |[[File:Magehunter.png|link=Magehunter|class=image2x]]<br><b>[[Magehunter]]</b> | ||
|[[File:Brigand Geomancer.png|link=Brigand Geomancer|class=image2x]]<br><b>[[Brigand Geomancer]]</b> | |[[File:Brigand Geomancer.png|link=Brigand Geomancer|class=image2x]]<br><b>[[Brigand Geomancer]]</b> | ||
|[[File:Brigand Electromancer.png|link=Brigand Electromancer|class=image2x]]<br><b>[[Brigand Electromancer]]</b> | |[[File:Brigand Electromancer.png|link=Brigand Electromancer|class=image2x]]<br><b>[[Brigand Electromancer]]</b> | ||
|[[File:Wolfhound.png|link=Wolfhound|class=image2x]]<br><b>[[Wolfhound]]</b> | |||
|- | |- | ||
| style="vertical-align: middle;" |'''Tier V''' | | rowspan="3" style="vertical-align: middle;" |'''Tier V''' | ||
|[[File: | |[[File:Robber Baron (Two-Handed Sword).png|link=Robber Baron (Two-Handed Sword)|class=image2x]]<br><b>[[Robber Baron (Two-Handed Sword)]]</b> | ||
| | |[[File:Robber Baron (Two-Handed Mace).png|link=Robber Baron (Two-Handed Mace)|class=image2x]]<br><b>[[Robber Baron (Two-Handed Mace)]]</b> | ||
|[[File: | |[[File:Ringleader (Sword).png|link=Ringleader (Sword)|class=image2x]]<br><b>[[Ringleader (Sword)]]</b> | ||
|[[File: | |[[File:Ringleader (Axe).png|link=Ringleader (Axe)|class=image2x]]<br><b>[[Ringleader (Axe)]]</b> | ||
|[[File:Robber Baron (Mace).png|link=Robber Baron (Mace)|class=image2x]]<br><b>[[Robber Baron (Mace)| | |[[File:Renegade (Two-Handed Sword).png|link=Renegade (Two-Handed Sword)|class=image2x]]<br><b>[[Renegade (Two-Handed Sword)]]</b> | ||
|[[File:Renegade (Two-Handed Axe).png|link=Renegade (Two-Handed Axe)|class=image2x]]<br><b>[[Renegade (Two-Handed Axe)]]</b> | |||
|[[File:Renegade (Two-Handed Mace).png|link=Renegade (Two-Handed Mace)|class=image2x]]<br><b>[[Renegade (Two-Handed Mace)]]</b> | |||
|[[File:Renegade (Halberd).png|link=Renegade (Halberd)|class=image2x]]<br><b>[[Renegade (Halberd)]]</b> | |||
|[[File:Renegade (Two-Handed Flail).png|link=Renegade (Two-Handed Flail)|class=image2x]]<br><b>[[Renegade (Two-Handed Flail)]]</b> | |||
|- | |||
|[[File:Robber Baron (Mace).png|link=Robber Baron (Mace)|class=image2x]]<br><b>[[Robber Baron (Mace)]]</b> | |||
|[[File:Rogue Witchfinder.png|link=Rogue Witchfinder|class=image2x]]<br><b>[[Rogue Witchfinder]]</b> | |||
|[[File:Duelist.png|link=Duelist|class=image2x]]<br><b>[[Duelist]]</b> | |[[File:Duelist.png|link=Duelist|class=image2x]]<br><b>[[Duelist]]</b> | ||
|[[File:Heavy Crossbowman.png|link=Heavy Crossbowman|class=image2x]]<br><b>[[Heavy Crossbowman]]</b> | |[[File:Heavy Crossbowman.png|link=Heavy Crossbowman|class=image2x]]<br><b>[[Heavy Crossbowman]]</b> | ||
|[[File: | |[[File:Brigand Pyromancer.png|link=Brigand Pyromancer|class=image2x]]<br><b>[[Brigand Pyromancer]]</b> | ||
|- | |||
| colspan="2" |[[File:Brigand Arcanist.png|link=Brigand Arcanist|class=image2x]]<br><b>[[Brigand Arcanist]]</b> | |||
|} | |} | ||
'''Secret Cults''' | '''Secret Cults''' — faction that differs from the others in its duality. | ||
{{Quote|TODO}} | {{Quote|TODO}} | ||
The first subfaction of the Secret Cults is the '''Undead''' | The first subfaction of the Secret Cults is the '''Undead''' — all sorts of evil dead, resurrected by the cult of necromancers that settled in [[Aldor|Aldor]]. The dungeon for them is the [[Dungeons#The Crypt|Crypt]]. | ||
{| class="stoneshard column valign-bottom cell-hover" style="width: 1500px; text-align: center; margin: auto;" | {| class="stoneshard column valign-bottom cell-hover" style="width: 1500px; text-align: center; margin: auto;" | ||
| Line 241: | Line 229: | ||
| colspan=2 | | | colspan=2 | | ||
|[[File:Restless.png|link=Restless]]<br><b>[[Restless]]</b> | |[[File:Restless.png|link=Restless]]<br><b>[[Restless]]</b> | ||
|[[File:Restless Peasant (Dagger).png|link=Restless Peasant (Dagger)]]<br><b>[[Restless Peasant (Dagger) | |[[File:Restless Peasant (Dagger).png|link=Restless Peasant (Dagger)]]<br><b>[[Restless Peasant (Dagger)]]</b> | ||
|[[File:Restless Peasant (Axe).png|link=Restless Peasant (Axe)]]<br><b>[[Restless Peasant (Axe) | |[[File:Restless Peasant (Axe).png|link=Restless Peasant (Axe)]]<br><b>[[Restless Peasant (Axe)]]</b> | ||
|[[File:Restless Peasant (Pitchfork).png|link=Restless Peasant (Pitchfork)]]<br><b>[[Restless Peasant (Pitchfork) | |[[File:Restless Peasant (Pitchfork).png|link=Restless Peasant (Pitchfork)]]<br><b>[[Restless Peasant (Pitchfork)]]</b> | ||
| colspan=7 | | | colspan=7 | | ||
|- | |- | ||
| Line 253: | Line 241: | ||
|[[File:Small Ghoul.png|link=Small Ghoul]]<br><b>[[Small Ghoul]]</b> | |[[File:Small Ghoul.png|link=Small Ghoul]]<br><b>[[Small Ghoul]]</b> | ||
| | | | ||
|[[File:Restless Guard (Sword).png|link=Restless Guard (Sword)]]<br><b>[[Restless Guard (Sword) | |[[File:Restless Guard (Sword).png|link=Restless Guard (Sword)]]<br><b>[[Restless Guard (Sword)]]</b> | ||
|[[File:Restless Brigand.png|link=Restless Brigand]]<br><b>[[Restless Brigand]]</b> | |[[File:Restless Brigand.png|link=Restless Brigand]]<br><b>[[Restless Brigand]]</b> | ||
|[[File:Restless Guard (Spear).png|link=Restless Guard (Spear)]]<br><b>[[Restless Guard (Spear) | |[[File:Restless Guard (Spear).png|link=Restless Guard (Spear)]]<br><b>[[Restless Guard (Spear)]]</b> | ||
|[[File:Restless Guard (Halberd).png|link=Restless Guard (Halberd)]]<br><b>[[Restless Guard (Halberd) | |[[File:Restless Guard (Halberd).png|link=Restless Guard (Halberd)]]<br><b>[[Restless Guard (Halberd)]]</b> | ||
|[[File: | |[[File:Risen Monk.png|link=Risen Monk]]<br><b>[[Risen Monk]]</b> | ||
|[[File: | |[[File:Risen Recruit (Sword).png|link=Risen Recruit (Sword)]]<br><b>[[Risen Recruit (Sword)]]</b> | ||
|[[File: | |[[File:Risen Recruit (Axe).png|link=Risen Recruit (Axe)]]<br><b>[[Risen Recruit (Axe)]]</b> | ||
|[[File: | |[[File:Risen Recruit (Mace).png|link=Risen Recruit (Mace)]]<br><b>[[Risen Recruit (Mace)]]</b> | ||
|[[File: | |[[File:Risen Watchman.png|link=Risen Watchman]]<br><b>[[Risen Watchman]]</b> | ||
| colspan=2 | [[File: | | colspan=2 | [[File:Risen Archer.png|link=Risen Archer]]<br><b>[[Risen Archer]]</b> | ||
|- | |- | ||
|style="vertical-align: middle;" rowspan=1|'''Tier III''' | |style="vertical-align: middle;" rowspan=1|'''Tier III''' | ||
| Line 272: | Line 260: | ||
|[[File:Wraith Cleric.png|link=Wraith Cleric]]<br><b>[[Wraith Cleric]]</b> | |[[File:Wraith Cleric.png|link=Wraith Cleric]]<br><b>[[Wraith Cleric]]</b> | ||
|[[File:Ghoul.png|link=Ghoul]]<br><b>[[Ghoul]]</b> | |[[File:Ghoul.png|link=Ghoul]]<br><b>[[Ghoul]]</b> | ||
|[[File:Ghast | |[[File:Ghast.png|link=Ghast]]<br><b>[[Ghast]]</b> | ||
|[[File:Restless Soldier (Mace).png|link=Restless Soldier (Mace)]]<br><b>[[Restless Soldier (Mace) | |[[File:Restless Soldier (Mace).png|link=Restless Soldier (Mace)]]<br><b>[[Restless Soldier (Mace)]]</b> | ||
|[[File:Restless Soldier (Axe).png|link=Restless Soldier (Axe)]]<br><b>[[Restless Soldier (Axe) | |[[File:Restless Soldier (Axe).png|link=Restless Soldier (Axe)]]<br><b>[[Restless Soldier (Axe)]]</b> | ||
| colspan=2 | [[File:Restless Soldier (Halberd).png|link=Restless Soldier (Halberd)]]<br><b>[[Restless Soldier (Halberd) | | colspan=2 | [[File:Restless Soldier (Halberd).png|link=Restless Soldier (Halberd)]]<br><b>[[Restless Soldier (Halberd)]]</b> | ||
|[[File: | |[[File:Risen Priest.png|link=Risen Priest]]<br><b>[[Risen Priest]]</b> | ||
|[[File: | |[[File:Risen Squire (Sword).png|link=Risen Squire (Sword)]]<br><b>[[Risen Squire (Sword)]]</b> | ||
|[[File: | |[[File:Risen Squire (Axe).png|link=Risen Squire (Axe)]]<br><b>[[Risen Squire (Axe)]]</b> | ||
|[[File: | |[[File:Risen Squire (Mace).png|link=Risen Squire (Mace)]]<br><b>[[Risen Squire (Mace)]]</b> | ||
|[[File: | |[[File:Risen Sariant.png|link=Risen Sariant]]<br><b>[[Risen Sariant]]</b> | ||
| colspan=2 | [[File: | | colspan=2 | [[File:Risen Bowman.png|link=Risen Bowman]]<br><b>[[Risen Bowman]]</b> | ||
|- | |- | ||
|style="vertical-align: middle;" rowspan=1|'''Tier IV''' | |style="vertical-align: middle;" rowspan=1|'''Tier IV''' | ||
| Line 291: | Line 279: | ||
|[[File:Large Ghoul.png|link=Large Ghoul]]<br><b>[[Large Ghoul]]</b> | |[[File:Large Ghoul.png|link=Large Ghoul]]<br><b>[[Large Ghoul]]</b> | ||
|[[File:Accursed Ghast.png|link=Accursed Ghast]]<br><b>[[Accursed Ghast]]</b> | |[[File:Accursed Ghast.png|link=Accursed Ghast]]<br><b>[[Accursed Ghast]]</b> | ||
|[[File:Putrid Restless Soldier (Two-Handed Mace).png|link=Putrid Restless Soldier (Two-Handed Mace)]]<br><b>[[Putrid Restless Soldier (Two-Handed Mace) | |[[File:Putrid Restless Soldier (Two-Handed Mace).png|link=Putrid Restless Soldier (Two-Handed Mace)]]<br><b>[[Putrid Restless Soldier (Two-Handed Mace)]]</b> | ||
|[[File:Putrid Restless Soldier (Two-Handed Axe).png|link=Putrid Restless Soldier (Two-Handed Axe)]]<br><b>[[Putrid Restless Soldier (Two-Handed Axe) | |[[File:Putrid Restless Soldier (Two-Handed Axe).png|link=Putrid Restless Soldier (Two-Handed Axe)]]<br><b>[[Putrid Restless Soldier (Two-Handed Axe)]]</b> | ||
| colspan=2 | [[File:Putrid Restless Soldier (Halberd).png|link=Putrid Restless Soldier (Halberd)]]<br><b>[[Putrid Restless Soldier (Halberd) | | colspan=2 | [[File:Putrid Restless Soldier (Halberd).png|link=Putrid Restless Soldier (Halberd)]]<br><b>[[Putrid Restless Soldier (Halberd)]]</b> | ||
|[[File: | |[[File:Risen Chaplain.png|link=Risen Chaplain]]<br><b>[[Risen Chaplain]]</b> | ||
|[[File: | |[[File:Risen Companion (Sword).png|link=Risen Companion (Sword)]]<br><b>[[Risen Companion (Sword)]]</b> | ||
|[[File: | |[[File:Risen Companion (Axe).png|link=Risen Companion (Axe)]]<br><b>[[Risen Companion (Axe)]]</b> | ||
|[[File: | |[[File:Risen Companion (Mace).png|link=Risen Companion (Mace)]]<br><b>[[Risen Companion (Mace)]]</b> | ||
|[[File: | |[[File:Risen Sergeant.png|link=Risen Sergeant]]<br><b>[[Risen Sergeant]]</b> | ||
| colspan=2 | [[File: | | colspan=2 | [[File:Risen Crossbowman.png|link=Risen Crossbowman]]<br><b>[[Risen Crossbowman]]</b> | ||
|- | |- | ||
|style="vertical-align: middle;" rowspan=1|'''Tier V''' | |style="vertical-align: middle;" rowspan=1|'''Tier V''' | ||
|[[File: | |[[File:Risen Marshal.png|link=Risen Marshal]]<br><b>[[Risen Marshal]]</b> | ||
|[[File:Wraithbinder.png|link=Wraithbinder]]<br><b>[[Wraithbinder]]</b> | |[[File:Wraithbinder.png|link=Wraithbinder]]<br><b>[[Wraithbinder]]</b> | ||
|[[File:Spectral Herald.png|link=Spectral Herald]]<br><b>[[Spectral Herald]]</b> | |[[File:Spectral Herald.png|link=Spectral Herald]]<br><b>[[Spectral Herald]]</b> | ||
| Line 309: | Line 297: | ||
|[[File:Ancient Ghast.png|link=Ancient Ghast]]<br><b>[[Ancient Ghast]]</b> | |[[File:Ancient Ghast.png|link=Ancient Ghast]]<br><b>[[Ancient Ghast]]</b> | ||
| colspan=4 | | | colspan=4 | | ||
|[[File: | |[[File:Risen Knight-Brother (Two-Handed Axe).png|link=Risen Knight-Brother (Two-Handed Axe)]]<br><b>[[Risen Knight-Brother (Two-Handed Axe)]]</b> | ||
|[[File: | |[[File:Risen Knight-Brother (Two-Handed Mace).png|link=Risen Knight-Brother (Two-Handed Mace)]]<br><b>[[Risen Knight-Brother (Two-Handed Mace)]]</b> | ||
|[[File: | |[[File:Risen Knight-Brother (Two-Handed Sword).png|link=Risen Knight-Brother (Two-Handed Sword)]]<br><b>[[Risen Knight-Brother (Two-Handed Sword)]]</b> | ||
|[[File: | |[[File:Risen Guardsman (Sword).png|link=Risen Guardsman (Sword)]]<br><b>[[Risen Guardsman (Sword)]]</b> | ||
|[[File: | |[[File:Risen Guardsman (Two-Handed Axe).png|link=Risen Guardsman (Two-Handed Axe)]]<br><b>[[Risen Guardsman (Two-Handed Axe)]]</b> | ||
|[[File: | |[[File:Risen Guardsman (Mace).png|link=Risen Guardsman (Mace)]]<br><b>[[Risen Guardsman (Mace)]]</b> | ||
|[[File: | |[[File:Risen Guardsman (Spear).png|link=Risen Guardsman (Spear)]]<br><b>[[Risen Guardsman (Spear)]]</b> | ||
|} | |} | ||
{{Quote|TODO}} | {{Quote|TODO}} | ||
The second subfaction of the Secret Cults are the '''Proselytes''' | The second subfaction of the Secret Cults are the '''Proselytes''' — mostly clergy who suffered from the Crimson Plague and were transformed into vampiric monsters. The dungeon for them is the [[Dungeons#The Catacombs|Catacombs]]. | ||
{| class="stoneshard column valign-bottom cell-hover" style="width: 1500px; text-align: center; margin: auto;" | {| class="stoneshard column valign-bottom cell-hover" style="width: 1500px; text-align: center; margin: auto;" | ||
| Line 334: | Line 322: | ||
| colspan="2" |[[File:Apostate.png|link=Apostate|class=image2x]]<br><b>[[Apostate]]</b> | | colspan="2" |[[File:Apostate.png|link=Apostate|class=image2x]]<br><b>[[Apostate]]</b> | ||
|[[File:Harbinger.png|link=Harbinger|class=image2x]]<br><b>[[Harbinger]]</b> | |[[File:Harbinger.png|link=Harbinger|class=image2x]]<br><b>[[Harbinger]]</b> | ||
|[[File:Tormentor | |[[File:Tormentor.png|link=Tormentor|class=image2x]]<br><b>[[Tormentor]]</b> | ||
|[[File:Immolated.png|link=Immolated|class=image2x]]<br><b>[[Immolated]]</b> | |[[File:Immolated.png|link=Immolated|class=image2x]]<br><b>[[Immolated]]</b> | ||
|[[File:Martyr.png|link=Martyr|class=image2x]]<br><b>[[Martyr]]</b> | |[[File:Martyr.png|link=Martyr|class=image2x]]<br><b>[[Martyr]]</b> | ||
| Line 344: | Line 332: | ||
|[[File:Flagellant.png|link=Flagellant|class=image2x]]<br><b>[[Flagellant]]</b> | |[[File:Flagellant.png|link=Flagellant|class=image2x]]<br><b>[[Flagellant]]</b> | ||
|[[File:Toller.png|link=Toller|class=image2x]]<br><b>[[Toller]]</b> | |[[File:Toller.png|link=Toller|class=image2x]]<br><b>[[Toller]]</b> | ||
|[[File: | |[[File:Adept.png|link=Adept|class=image2x]]<br><b>[[Adept]]</b> | ||
| | | | ||
|- | |- | ||
| Line 352: | Line 340: | ||
|[[File:Impaler.png|link=Impaler|class=image2x]]<br><b>[[Impaler]]</b> | |[[File:Impaler.png|link=Impaler|class=image2x]]<br><b>[[Impaler]]</b> | ||
|[[File:Chosen.png|link=Chosen|class=image2x]]<br><b>[[Chosen]]</b> | |[[File:Chosen.png|link=Chosen|class=image2x]]<br><b>[[Chosen]]</b> | ||
|[[File:Sanguimage | |[[File:Sanguimage.png|link=Sanguimage|class=image2x]]<br><b>[[Sanguimage]]</b> | ||
|[[File:Blood Golem.png|link=Blood Golem|class=image2x]]<br><b>[[Blood Golem]]</b> | |[[File:Blood Golem.png|link=Blood Golem|class=image2x]]<br><b>[[Blood Golem]]</b> | ||
|- | |- | ||
| Line 372: | Line 360: | ||
| | | | ||
| | | | ||
|} | |||
'''The Hive''' — faction made up of massive gastropods with a caste-based social structure. The dungeons for them are [[Dungeons|Overgrown Сaves]] and [[Dungeons|Mines]]. | |||
{| class="stoneshard column valign-bottom cell-hover" style="width: 1000px; text-align: center; margin: auto;" | |||
! colspan="4" | | |||
===The Hive=== | |||
|- | |||
! colspan="1" |Mini-bosses | |||
! colspan="3" |Common Enemies | |||
|- | |||
|[[File:Rockeater Queen.png|link=Rockeater Queen|class=image2x]]<br><b>[[Rockeater Queen]]</b> [[File:Marker cave white.png|link=|16px]] | |||
|[[File:Rockeater Worker.png|link=Rockeater Worker|class=image2x]]<br><b>[[Rockeater Worker]]</b> [[File:Marker cave white.png|link=|16px]] | |||
|[[File:Rockeater Soldier.png|link=Rockeater Soldier|class=image2x]]<br><b>[[Rockeater Soldier]]</b> [[File:Marker cave white.png|link=|16px]] | |||
|[[File:Rockeater Hunter.png|link=Rockeater Hunter|class=image2x]]<br><b>[[Rockeater Hunter]]</b> [[File:Marker cave white.png|link=|16px]] | |||
|} | |||
'''Bosses''' are unique mobs that appear only once per playthrough and have unique quest for killing them, they are distinctly more dangerous and tougher than other mobs, they provide unique challenges but also equivalent rewards. With [[Resourcefulness]] they can drop unique expensive loot, for example [[Troll Pelt]] from Ancient Troll. | |||
{| class="stoneshard column valign-bottom cell-hover" style="width: 1000px; text-align: center; margin: auto;" | |||
! colspan="10" | | |||
=== Bosses === | |||
|- | |||
|style="vertical-align: middle;" rowspan=1|'''Plot''' | |||
|[[File:Archon.png|link=Ascended Archon|class=image2x]][[File:Ascended Archon.png|link=Ascended Archon|class=image2x]]<br><b>[[Ascended Archon]]</b> | |||
|- | |||
|style="vertical-align: middle;" rowspan=1|'''Side Quests''' | |||
|[[File:Ancient Troll.png|link=Ancient Troll|class=image2x]]<br><b>[[Ancient Troll]]</b> | |||
|[[File:Manticore.png|link=Manticore|class=image2x]]<br><b>[[Manticore]]</b> | |||
|} | |||
Some enemies can only be encountered during certain quests or, in the case of minions, during the battle with the corresponding Boss. | |||
{| class="stoneshard column valign-bottom cell-hover" style="width: 1150px; text-align: center; margin: auto;" | |||
! colspan="10" | | |||
=== Plot Unique Enemies === | |||
|- | |||
|[[File:Cultist.png|link=Cultist|class=image2x]]<br><b>[[Cultist]]</b> | |||
|[[File:Ritual Restless.png|link=Ritual Restless|class=image2x]]<br><b>[[Ritual Restless]]</b> | |||
|[[File:Kromm (Enemy).png|link=Kromm|class=image2x]]<br><b>[[Kromm]]</b> | |||
|[[File:Barm (Enemy).png|link=Barm|class=image2x]]<br><b>[[Barm]]</b> | |||
|[[File:Will (Enemy).png|link=Will|class=image2x]]<br><b>[[Will]]</b> | |||
|[[File:Revon (Enemy).png|link=Revon|class=image2x]]<br><b>[[Revon]]</b> | |||
|- | |||
|[[File:Vyr (Enemy).png|link=Vyr|class=image2x]]<br><b>[[Vyr]]</b> | |||
|[[File:Halmar (Enemy).png|link=Halmar|class=image2x]]<br><b>[[Halmar]]</b> | |||
|[[File:Venn.png|link=Venn|class=image2x]]<br><b>[[Venn]]</b> | |||
|[[File:Sverk.png|link=Sverk|class=image2x]]<br><b>[[Sverk]]</b> | |||
|[[File:Risen Axonian.png|link=Risen Axonian|class=image2x]]<br><b>[[Risen Axonian]]</b> | |||
|} | |||
==Sorcerous Creations== | |||
Objects and beings created by practitioners of sorceries. | |||
{| class="stoneshard column valign-bottom cell-hover" style="width: 600px; text-align: center; margin: auto;" | |||
! colspan="2" | | |||
=== Arcanistic Summons === | |||
|- | |||
|[[File:Mana Crystal (enemy).png|link=Mana Crystal (enemy)|class=image2x]]<br><b>[[Mana Crystal (enemy)|Mana Crystal]]</b> | |||
|[[File:Phantasm (enemy).png|gif|link=Phantasm (enemy)|class=image2x]]<br><b>[[Phantasm (enemy)|Phantasm]]</b> | |||
|} | |||
==Caravan Training Area== | |||
After the correspond upgrade, peculiar "enemies" will appear in the [[Caravan & Followers|Caravan Camp]] to test [[Weapons]] and abilities. | |||
{| class="stoneshard column valign-bottom cell-hover" style="width: 1000px; text-align: center; margin: auto;" | |||
! colspan="3" | | |||
=== Straw Dummies === | |||
|- | |||
|[[File:Straw Dummy (Enemy).png|link=Straw Dummy (Enemy)|class=image2x]]<br><b>[[Straw Dummy (Enemy)|Straw Dummy]]</b> | |||
|[[File:Straw Dummy (Medium).png|link=Straw Dummy (Medium)|class=image2x]]<br><b>[[Straw Dummy (Medium)]]</b> | |||
|[[File:Straw Dummy (Armored).png|link=Straw Dummy (Armored)|class=image2x]]<br><b>[[Straw Dummy (Armored)]]</b> | |||
|} | |} | ||
{{Template:Navigation||plain}} | {{Template:Navigation||plain}} | ||
[[Category:Enemies|*]] | [[Category:Enemies|*]] | ||
Latest revision as of 20:20, 18 August 2025
Wildlife
| “ | The animals are divided into: a — those belonging to the Emperor, b — embalmed ones, c — trained ones, d — suckling pigs, e — sirens, f — fabled ones, g — stray dogs, h — those included in this classification, i — those that tremble as if they were mad, j — innumerable ones, k — those drawn with a very fine camel hair brush, l — et cetera, m — those that have just broken the vase, n — those that from afar look like flies. | „ |
| ~ Celestial Emporium of Benevolent Knowledge |
Animals are NPCs that roam the Plains, Forests, and other Biomes. Sometimes, they fight with each other or wait until prey enters their field of vision.
Harmless Animals are mobs that will run away when they see or hear a player character. Most of them have valuable horns or pelts that can be harvested with Butchering from Survival skill tree.
Harmless Animals | |||||||||
|---|---|---|---|---|---|---|---|---|---|
 Deer |
  Saiga |
 Horse | |||||||
Pig |
Sheep |
Cow | |||||||
Fox |
Rabbit |
Squirrel | |||||||
Hedgehog |
Cat |
Dog | |||||||
Birds | |||||||||
|---|---|---|---|---|---|---|---|---|---|
Chicken |
Rooster |
Tit |
Bunting |
Raven |
Pigeon | ||||
Sparrow |
Swallow |
Thrush |
Wren |
Jay |
Seagull | ||||
Mallard |
Owl | ||||||||
Hostile Animals are mobs that will become suspicious when they hear or see a player and will hold their position and try to scare the player away by making specific sound and animation. If the player stays in their close proximity for too long or comes too close, these animals will also enter the Hostile state. Otherwise, if player leaves their close proximity quickly enough, the animals will go back to the Unaware state.
Hostile Animals | |||||||||
|---|---|---|---|---|---|---|---|---|---|
| Mini-bosses | Beasts | ||||||||
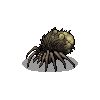 Crawler Broodmother |
 Bear |
Boar |
 Bison |
Spiderling |
Crawler |
Deathstinger Swarm | |||
Forest Viper |
Rat Swarm |
 Harpy |
 Moose |
Wolf |
Feral Dog | ||||
Gulon |
 Young Troll |
Bat Swarm | |||||||
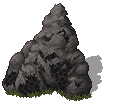
Nests & Hives are creatures that appear in some Points of Interest, they are surrounded by relevant mobs, Hives surrounded by Deathstinger Swarm and etc. They will eventually spawn mobs, some of them will do it in short period of time, some of them will do it after a lot of time has passed.
Nests & Hives | |||
|---|---|---|---|
    Deathstinger Hive |
     Harpies Nest | ||
   Crawler Burrow |
 Soul Well | ||
Enemies
Enemies are all creatures that will attack you on sight. There are many different kinds of enemies and each comes with their own set of priorities and Skills they can use. Enemies of a certain type cooperate together (for example, Wolves form packs), but they may not cooperate with enemies of a different type (for example, Wolves and Bandits will attack each other).
| “ | TODO | „ |
Brigands — faction mostly made up of people: from ragamuffins and marauders at the first "shooting ranges" to deserters and former mercenaries at the later ones. The dungeon for them is the Bastion. Brigands are the only type of Enemies that can spawn on the surface, with the exception of Ghouls.
Secret Cults — faction that differs from the others in its duality.
| “ | TODO | „ |
The first subfaction of the Secret Cults is the Undead — all sorts of evil dead, resurrected by the cult of necromancers that settled in Aldor. The dungeon for them is the Crypt.
| “ | TODO | „ |
The second subfaction of the Secret Cults are the Proselytes — mostly clergy who suffered from the Crimson Plague and were transformed into vampiric monsters. The dungeon for them is the Catacombs.
Secret Cults (Proselytes) | |||||||
|---|---|---|---|---|---|---|---|
| Mini-bosses | Common Enemies | ||||||
| Tier I |  Apostate |
Harbinger |
 Tormentor |
 Immolated |
Martyr |
Dead Martyr | |
| Tier II | Matriarch |
 Outcast |
Flagellant |
 Toller |
 Adept |
||
| Tier III | Abomination |
Saggul |
Impaler |
Chosen |
 Sanguimage |
Blood Golem | |
| Tier IV |  Brander |
 Anmarrak |
 Fiend |
Girrud |
Tentacle Arm |
|
| Tier V |  Juggernaut |
 Wormbearer |
Yagram |
Murkstalker |
Leechworm |
||
The Hive — faction made up of massive gastropods with a caste-based social structure. The dungeons for them are Overgrown Сaves and Mines.
The Hive | |||
|---|---|---|---|
| Mini-bosses | Common Enemies | ||
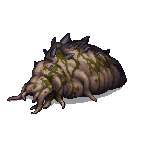 Rockeater Queen |
 Rockeater Worker |
 Rockeater Soldier |
 Rockeater Hunter |
Bosses are unique mobs that appear only once per playthrough and have unique quest for killing them, they are distinctly more dangerous and tougher than other mobs, they provide unique challenges but also equivalent rewards. With Resourcefulness they can drop unique expensive loot, for example Troll Pelt from Ancient Troll.
Bosses | |||||||||
|---|---|---|---|---|---|---|---|---|---|
| Plot |  Ascended Archon | ||||||||
| Side Quests | 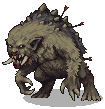 Ancient Troll |
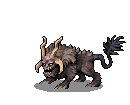 Manticore | |||||||
Some enemies can only be encountered during certain quests or, in the case of minions, during the battle with the corresponding Boss.
Plot Unique Enemies | |||||||||
|---|---|---|---|---|---|---|---|---|---|
 Cultist |
Ritual Restless |
Kromm |
Barm |
Will |
Revon | ||||
Vyr |
Halmar |
Venn |
Sverk |
Risen Axonian | |||||
Sorcerous Creations
Objects and beings created by practitioners of sorceries.
Arcanistic Summons | |
|---|---|
 Mana Crystal |
 Phantasm |
Caravan Training Area
After the correspond upgrade, peculiar "enemies" will appear in the Caravan Camp to test Weapons and abilities.
Straw Dummies | ||
|---|---|---|
Straw Dummy |
Straw Dummy (Medium) |
Straw Dummy (Armored) |
Page last edited during patch: 0.9.3.6
| ||||||||||||||||||||||||||||
| |||||
